Export Time-Lapse Video
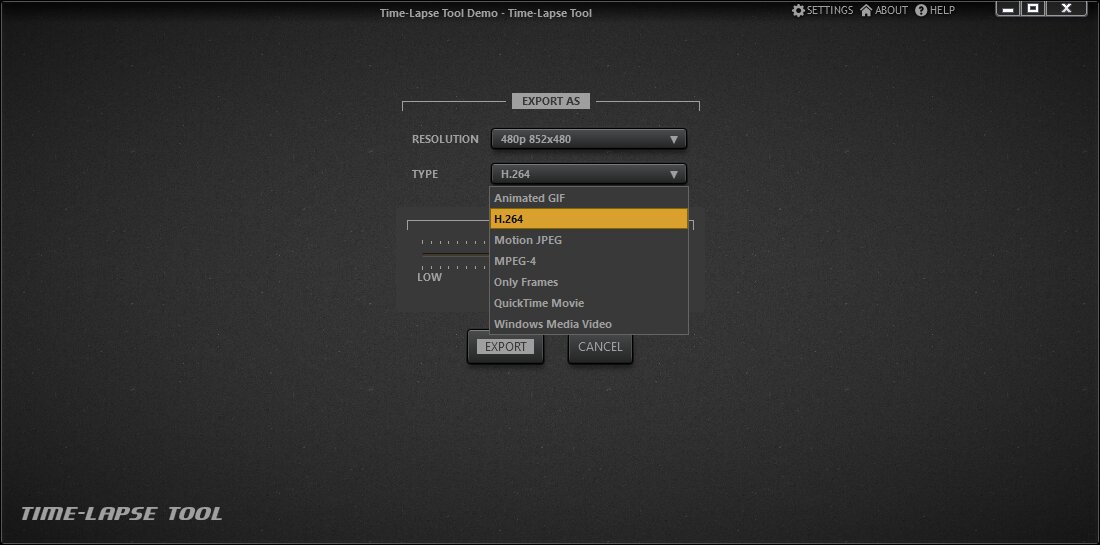
The Export screen allows you to choose the output format of the video you are exporting. You can then adjust the video quality and resolution of the final time-lapse video. When you have finished adjusting all of the desired settings, click the EXPORT button. The timelapse software asks you for the target video filename then starts creating your video.

Output formats
Time-Lapse Tool supports following output formats:
- H.264 is the most common video format on the Web now. It requires a lot of PC resources to generate a file but provides the smallest file size. This is a perfect format for web publishing.
- Motion JPEG (for maximum frame quality).
- MPEG‑4 (to view on your old DVD player).
- QuickTime Video is the former Apple video standard format.
- Windows Media Video is the native Windows Media Player format.

Our time-lapse maker also allows you to make a GIF and to share your animation on any webpage.
In addition, the program can export every video frame as a JPEG image to a separate folder, which can be useful for further images processing using other software.
The software allows you to define the quality level for each video output format. The high quality means the biggest file size. Please note that higher quality video require more CPU resources and RAM.
Note: This feature is available on the Business license only.

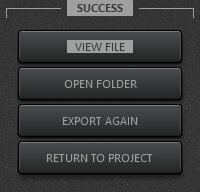
These options are shown once export has been completed successfully.
- VIEW FILE opens the generated video file in the default Windows video player.
- OPEN FOLDER opens the Explorer folder window where the time-lapse video file you generated is selected. The file can then be copied or moved to another location.
- EXPORT AGAIN allows you to export the same video to another format or to export a video with a higher resolution.
- RETURN TO PROJECT takes you back to the project view.
Export via command line
It is possible to automate the export of existing project using command line options. Following options are available:
- --input - path to a project file. This option is required.
- --output - path to an output file. The software overwrites the output destination if it exists already. If --export is set to youtube then output value means a video name not a file system path. This option is required as well.
- --export - defines the export format, defaults to h264. Available
export formats are:
- animatedgif
- h264
- mjpeg
- mpeg4
- quicktime
- wmv2
- youtube
- --height defines output video height, defaults to 480. The program finds a most suitable resolution for project aspect ratio based on passed height option.
- --refresh commands the software to reimport images from the folder for each sequence in the project. This feature allows automatic exporting after new images are added to the project folder.
If any format type or resolution passed by command line options is not available for application license type then program opens the export screen to correct this.
Export hints and notes
- Video generation in HD or 4K resolutions requires large amounts of memory. You typically need 3-4GB of memory for successful video generation.
- H.264 format requires a huge amount of memory if you are creating a video with 4K resolution. You will need more than 16GB of RAM to completely finish creating your video.
- Generating QuickTime videos may also require huge amounts of memory in some cases.
- Time-Lapse Tool checks the available memory before creating your time-lapse video. If your computer doesn’t have enough free memory, the application will not start generating your video and a message will appear indicating there is not enough free memory to complete your video. If this happens, close a few of the other applications running on your computer to free some memory then run the export again.
- The Export process requires exclusive access to the time-lapse video file until video creation is complete. The export could fail if the video is being generated to a Dropbox folder or other external location. To avoid this kind of failure, you can export your video to the desktop folder then move the file to a Dropbox folder once the time-lapse video exporting is completed.
- If you choose to export every frame as a separate image, the Export process requires that you have a lot of free space in your target folder.
- Please note that you may only export HD and 4K video formats in the paid version of Time-Lapse Tool.