Adding Images to a Project
The Import screen allows you to add images to your time-lapse video project. This screen is designed to simplify navigation of your PC drive and folders to help you quickly locate the images you want to use in your project.
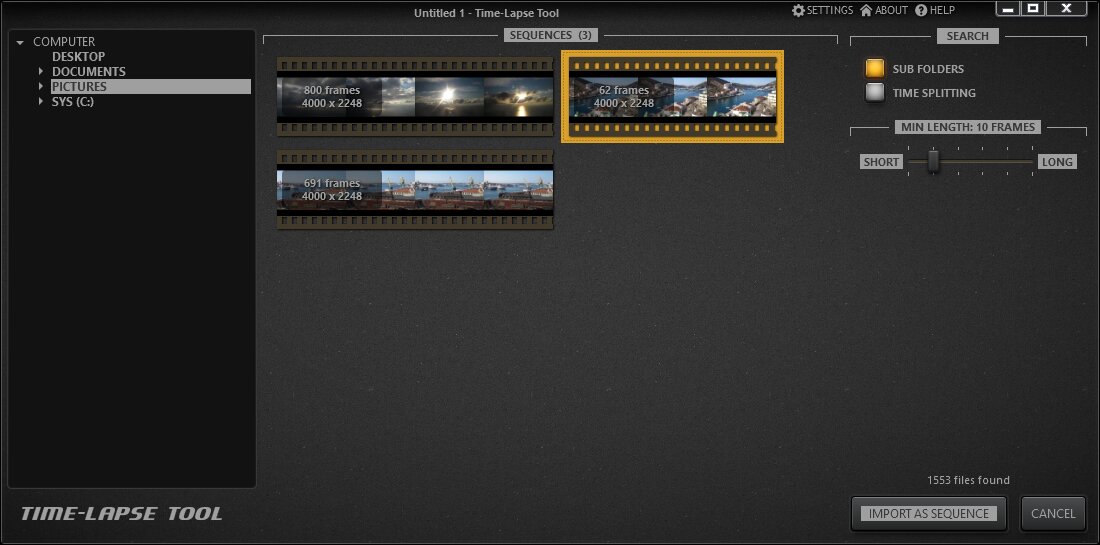
The left portion of the view contains a tree of folders. The available images for the selected folder are displayed in the middle of the screen. All images are automatically grouped into sets using different criteria. There are a number of settings you can use to adjust the criteria for your images on the right side of the screen.
Each set header has general set information, including:
- number of frames in the sequence
- the interval at which the frames were captured
- image size

Supported image formats
Time-Lapse Tool imports the following image formats:
- JPEG
- PNG
- BMP
- GIF (single frame only)
Note: Our timelapse software does not yet support the RAW file format.

Import settings
The program groups all images in a selected folder into a single set using default settings.
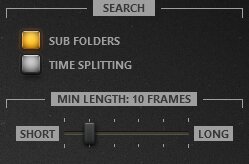
You can also add sets with images from sub-folders by checking the SUB FOLDERS check box. This option can simplify locating image sets since thumbnails for key images from each set are shown.
By default, the most recent images are shown at the top of the list.
The TIME SPLITTING checkbox simplifies still image grouping by using the interval between shots. Images in each folder are ordered by capture time then sets are created. If the interval between two sequential still shots is too long then another image set is started. Even if the program caches parsed results, accessing the first folder could require a significant amount of time in this mode.
NOTE: If two images have different sizes, they will be grouped in separate sets in the time-splitting mode.
If the number of frames in the desired sequence is known, then the MIN LENGTH slider can be adjusted to filter out sets containing a smaller number of images.
Using the SUB FOLDERS option could increase processing time significantly if the selected folder has a deep sub-folder hierarchy and contains a large number of images.
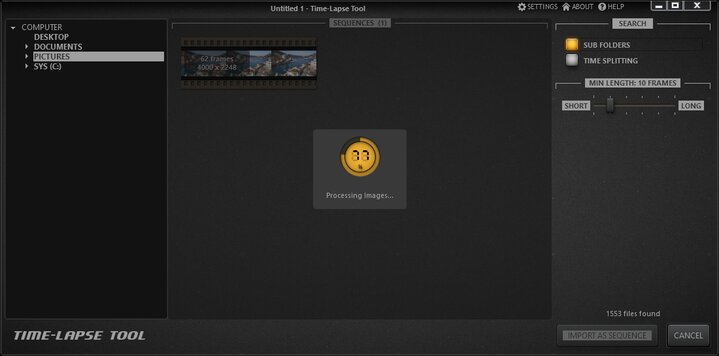
If splitting affected images into sets is taking significant time, the progress indicator is displayed. However, this indicator does not prevent you from adjusting the set filtering criteria or even canceling the import.
To add a set of images to the time-lapse project, select an image in the middle of a sequence then click on IMPORT AS SEQUENCE.
You can also select multiple sets using Ctrl+click to select a series of sets then import all of them at once into your project. Each selected set is added to the project as a separate sequence.

Import hints and notes
- Removable drives are not shown in this tree. If the images you want to add to the project are on a USB stick or card reader, these files should be copied to the computer’s hard drive first. Afterward, the transferred images can be imported into a project from the hard drive.
- The time-lapse maker refreshes the list of available images when you change the folder selection in the tree or adjust any import setting.
- Images in each folder are ordered by filename before applying other splitting criteria. But the order also takes image "index" into account. The index refers to the digits at the end of the image filename. This effectively sorts the images Windows imports from the camera into a folder. E.g. images are sorted in numerical order, (e.g. image_001.jpg, image_002.jpg, ... image_999.jpg, image_1000.jpg, etc.)
- The program ignores small images (less than 8192 bytes) in any set.